Deployment Image Servicing Management (DISM) - Removing An Injected Update From The Image
The following commands are used to identify and remove an update that has been injected into the image.
The DISM commands need to be executed from the Deployment Tools Command Prompt. This is part of the Windows AIK.
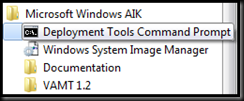
First, we need to get some information on the image so we can properly mount the image using DISM.
Dism /Get-WIMInfo /WimFile:e:\packages\osd\os_image\w7-x64-b2.wim
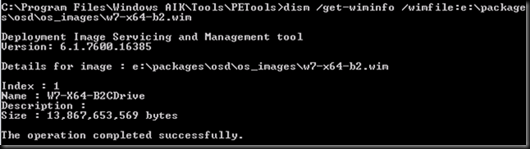
Now that we have the image name and/or index, we can properly mount the image.
Dism /Mount-WIM /WimFile:e:\packages\osd\os_image\w7-x64-b2.wim /Name:“W7-X64-B2Cdrive” /MountDir:C:\mount

Next, we want to output a list of the installed updates so we can get the update unique ID.
Dism /Image:C:\mount /Get-Packages >c:\featurelist.txt

After dumping the update list to the featurelist.txt, open it and search for the update you want to remove. We need to find the full name in order to remove it. (We searched for the KB ID in this example)
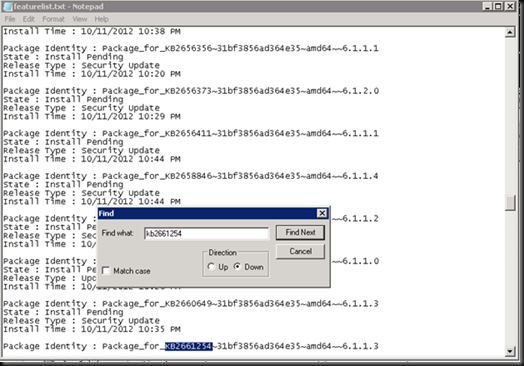
Once you have the unique ID for the update, we can then issue the command to remove the update from the image.
DISM /Image:C:\mount /Remove-Package /PackageName:Package_for_KB266125431bf385ad364e35amd64~~6.1.1.3
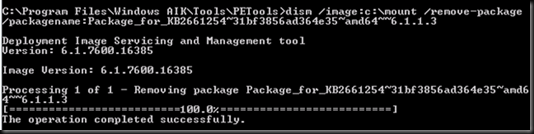
Once the update has been removed, we can unmount the image and commit (save) our changes.
Dism /Unmount-WIM /MountDir:C:\mount /Commit
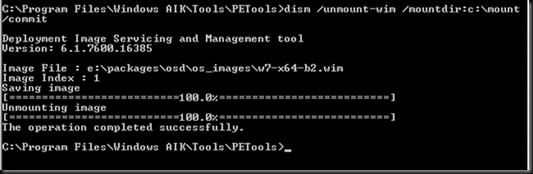
Now that the update has been removed from the image, the ConfigMgr Distribution Points would need to be updated to reflect the changes.